Horizon Tracking Limits Editor

Contents
Overview
The window shown below under #3 is where you will actually describe your horizon graphically and save it for APCC to use. There are several ways to create your horizon from a simple drawing which can be done in under a minute for a one-time portable setup, to a detailed mapping with precisely accurate horizons for a permanent observatory. The detailed mapping will, of course, take a bit longer!
Shortcut for defining a fixed horizon limit
If all you need is a horizon at a fixed altitude (for example if you only want to image above a certain altitude, or you do not have any obstructions that you want to map in your horizons) using the Fixed Limit may be the easiest approach.
This is found on the Horizon tab main screen:
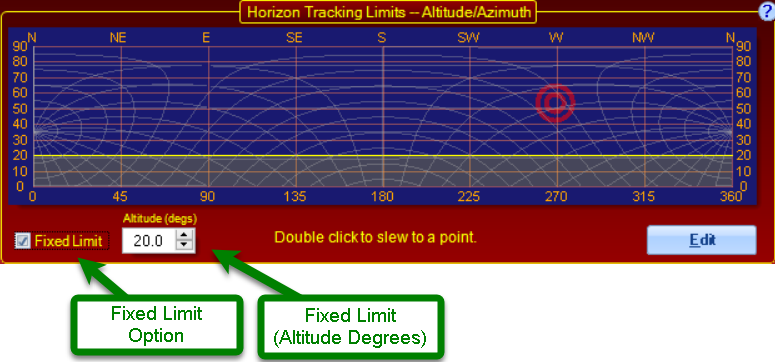
To use the Fixed Limit, simply enable the checkbox and enter a desired minimum altitude (in degrees). You will see your Horizon limit updated in the graphical representation.
To reset your horizon limit to 0, simply enter 0 for the fixed limit altitude.
Instructions for creating and / or editing your custom horizon.
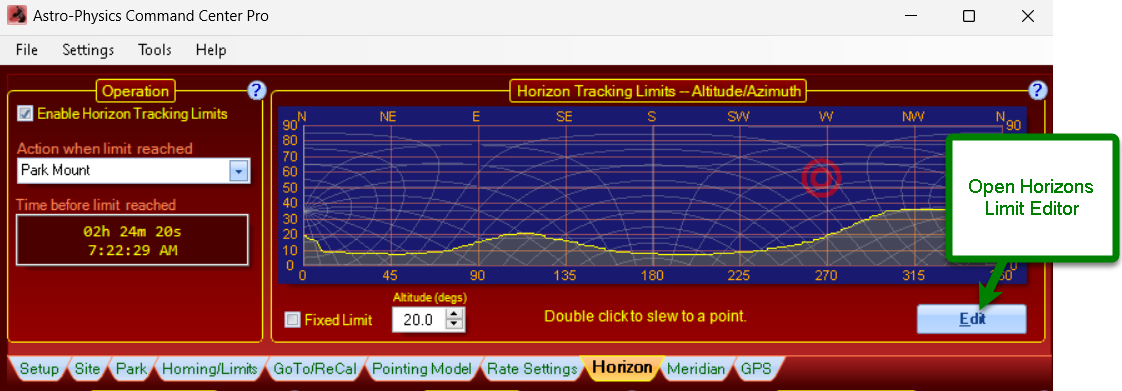
1.Click on Horizon tab in APCC main window.
2.Click on Edit button to lower right of horizon limit graphical representation. This opens the Horizon Tracking Limits Editor Window.
Note: View shown above is from a Northern Hemisphere installation.
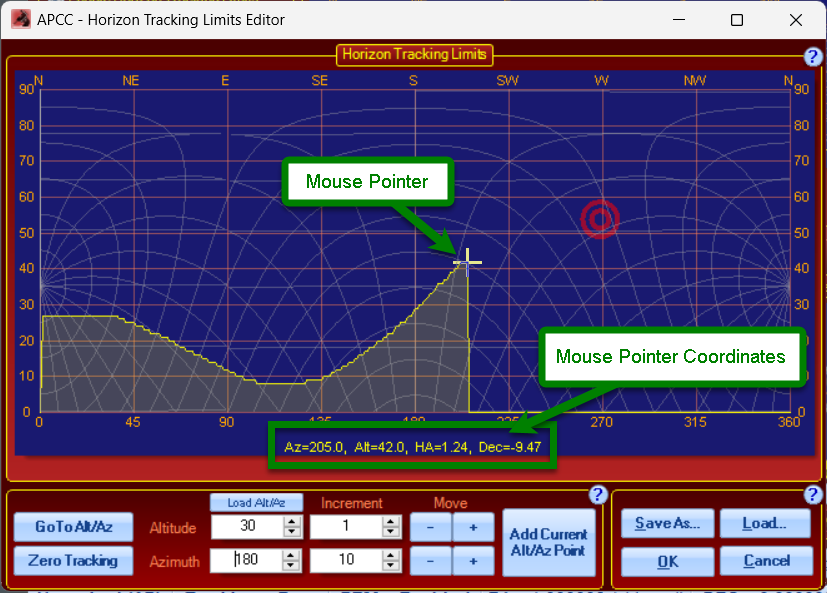
3.The Horizon Tracking Limits Editor Window. Your custom horizon will be created and displayed in the Horizon Tracking Limits Graph. Graphs for each hemisphere are shown below.
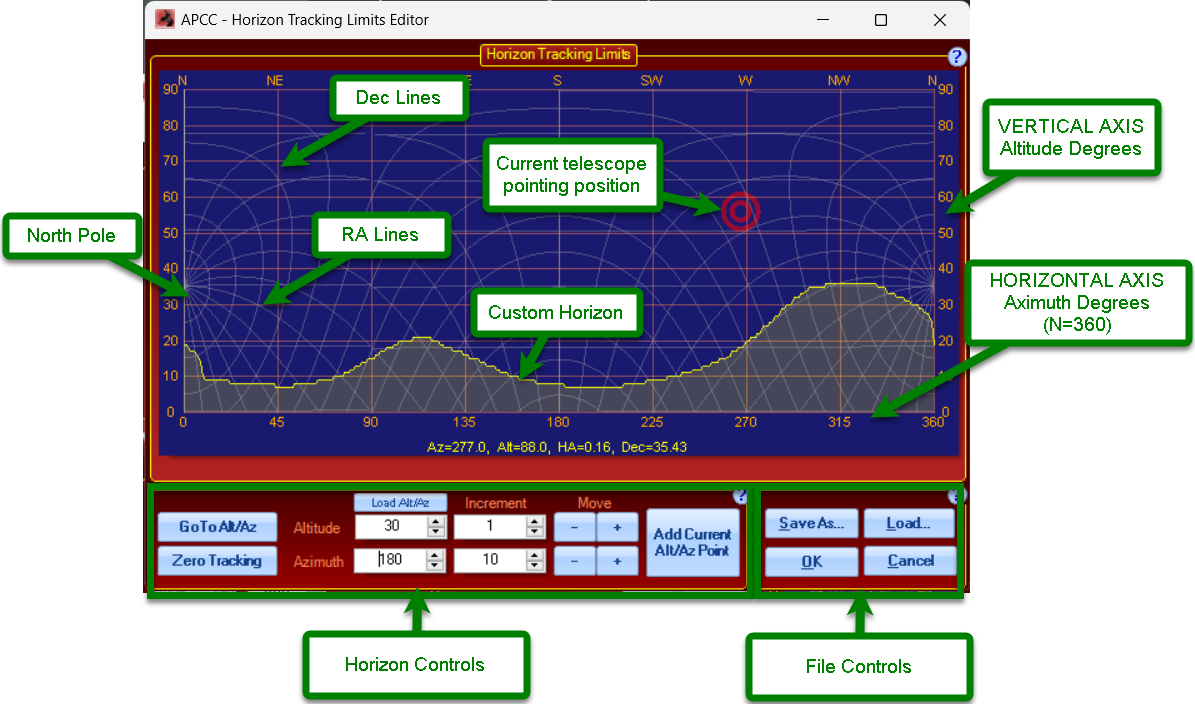
•Horizontal Axis: The horizontal axis of the Horizon Tracking Limits Editor represents the full-circle panorama of your observing location. The scale at the top of the graphic represents the compass points, and the scale at the bottom is in degrees of azimuth. It is conventional in astronomy to always set the 0/360 azimuth point as due north with the circle going around to the east, regardless of the hemisphere you are in.
•Vertical Axis: The vertical axis represents the altitude from zero to the zenith. (0=unobstructed horizon; 90=zenith)
•R.A. and Declination lines. The curvy lines are the R.A. and Declination lines as they are mapped onto the rectangular Alt/Az grid.
•The Horizon Controls and File Controls that are identified in the images above are explained below.
Setting up Your Limits - Simplest Method
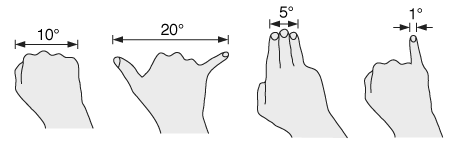
Draw approximate horizon on Horizon Tracking Limits Editor Window of APCC. This may be the preferred method for star parties and portable setups. You can have a workable result in a minute or less. To draw your horizon, start by noting the horizon surrounding your mount. Take note of the average horizon level you will wish to use, and also the possible differences in sky glow in different directions. Use the old astronomer's trick of using fingers on an outstretched hand to estimate the height of the usable horizon.
Finally, note any obstructions like buildings or trees that will create "bumps" in your horizon. Then simply follow these steps:
1.Place the mouse pointer at a point that will be on your horizon.
2.Click and hold down the left mouse button and drag to start drawing.
3.Edit or change what you've drawn by simply clicking on or near your drawn horizon line and redrawing. You can erase your results by dragging the mouse along the 0 line on the bottom.
4.You may find it easiest to start by draw the primary line first, and then go back and edit to deal with trees, buildings or other obstructions.
5.If you wish to save the horizon limits, click the Save As... button on the right side of the controls.
6.If you simply wish to use the limits for the one night, then just click the OK button without saving. It is probably advisable to go ahead and save anything that you have invested some time in, even as a temporary file just in case your computer crashes during the night.
7.You can always go back and edit the active horizon limits whether you have saved them or not by simply clicking the Edit button from the Horizon tab of the main APCC window.
Horizon Controls - a more precise method
Use the Horizon Controls or keypad or both to move around and add points.
1.Temporarily turn OFF meridian limits and pointing and tracking corrections if applicable.
2.Click the Zero Tracking button in the lower left of the horizon editor screen.
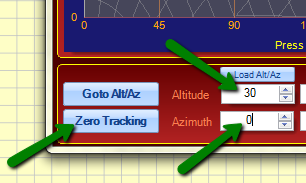
3.Start at Azimuth zero and estimate your horizon-altitude at that point.
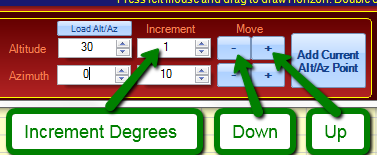
4.Adjust altitude incrementally until you find the horizon. Since R.A. and Dec. do not move conveniently in Alt/Az, it is often easiest to use the increment feature in the horizon editor. With this feature you can simply click a single button to point the telescope up (+) or down (-) by the chosen incremental value in degrees. Your altitude increments will probably be smaller than the azimuth increments you will use (probably in the 1 - 5 degree range). Both R.A. and Dec. will move so that the azimuth will be maintained as the altitude is adjusted.
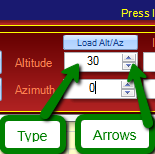
As an alternative, you can also simply enter the altitude in the box to the left of the increment box. The value can be typed in or adjusted via the up/down arrows.
5.When you are satisfied with the pointing position, add the current point to your limits. Simply click the  button at the bottom center of the window. The Horizon Editor will draw a line connecting this new point to the previously added point (once you are past the first point at azimuth=0)
6.Increment to next azimuth and repeat. This is done in the same manner as the altitude increments described above except, of course, that you will use the lower set of Azimuth controls. Azimuth increments can be quite large, especially if there is a region of your horizon that is relatively straight. The line that the Horizon Editor will draw can slope up or down, so the important thing is that the horizon forms a straight (not necessarily flat) line without bumps or dips.
7.Continue with this process until the azimuth circle has been completed.
Hints and Tricks:
•Skip large chunks of azimuth where the horizon is flat or has a straight line (i.e. roof line) by either entering an azimuth manually followed by clicking the GoTo Az/Alt button, or by double-clicking a spot on the graph at the approximate azimuth where the horizon changes. This is especially useful for the long straight walls of roll-off-roof observatories.
•As an example: I built a very accurate horizon limit model for inside AP's roll-off-roof observatory with only 9 well placed points. The observatory is a double roll off that divides in the middle with the roof halves rolling off to the north and the south respectively. The following should be considered an example only. The exact sequence of steps will probably not be ideal for your situation.
o1st point was at Azimuth=0 and was the peak of the north roof segment. 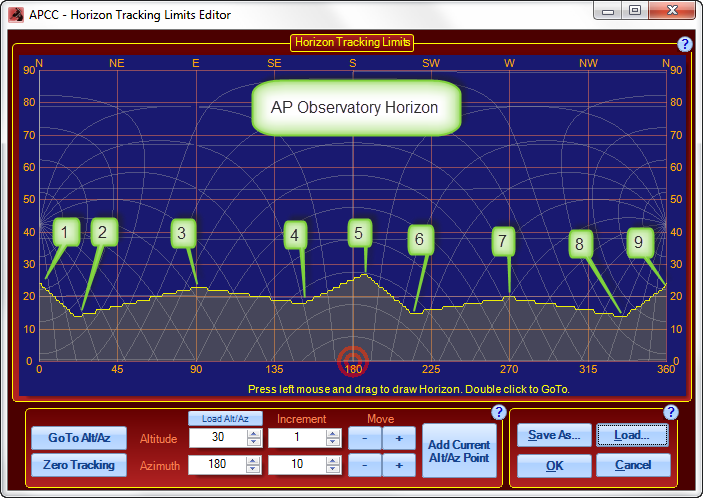
o2nd point where roof met east wall (NNE).
o3rd point due east.
o4th point where east wall met southern roof segment (SSE).
o5th point due south at peak of southern roof segment.
o6th point where roof meets west wall (SSW).
o7th point due west.
o8th point where west wall meets north roof segment (NNW).
o9th point back to peak of north roof segment.
Note that this particular test setup was not centered in the observatory.
This is the reason for the minor asymmetry in the horizon graph.
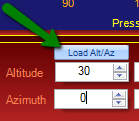
•You may find it easiest to move to a spot with the keypad's direction buttons. Then click the Load Alt/Az:
•Another really good trick is to double-click your best guess as to the next point on the graph. The mount will slew to the Alt/Az of the clicked point. Then adjust the position with your keypad. The keypad is handy because it allows you to sight along your OTA as you make the fine adjustments. When you are happy with the point location, go back to the Horizon Tracking Limits Editor and:
a.Click the Load Alt/Az button
b.Click the Add Current Alt/Az Point button
c.Go to the next point.
This can be especially useful for getting the azimuth of an obstruction right. Once the scope is pointing to the correct azimuth, load the Alt/Az coordinates and then adjust the altitude using the incremental moves described above.
•When double-clicking on the graph in the Horizon Tracking Limits Editor, be aware of the points where there would normally be a meridian flip. ( 0°/360° and 180°) If you try to click exactly on the line, you may or may not go to the side you wish because of the limits of your screen resolution. Instead, at 0° and 360°, click just inside the line (barely inside the graph window). For the 180° point entry, do one just to the left, and then do one just to the right of the line.
•When clicking on the graph in the Horizon Tracking Limits Editor, keep your sky glow in mind! There is no sense in outlining a detailed horizon in a direction where light pollution effectively raises the usable horizon above all the trees, buildings etc. that you so carefully outlined. This is an easy error to make if preparing the horizon limits during daylight.
File Controls - Manage your Horizon Tracking Limits
•Click the Save As button to save the newly drawn or edited limit. Multiple horizon limits can be saved for different locations. Please be sure to double check that the path for your saved horizon limit is correct. Horizon Limit files will have the suffix: .hrz. We have found it advantageous to give all settings files for a given location the same or a similar name.
•Click Load to bring up a previously saved horizon limit.
•Click OK to place the newly drawn limit into APCC for immediate use.
•Click Cancel to close the window without saving the limit or placing it into APCC.